Nookduino Setup
Get ready to get your Nookduino up and running! Just follow these steps and you'll go from turning your board on to programming custom messages in no time.
1. Powering up your board

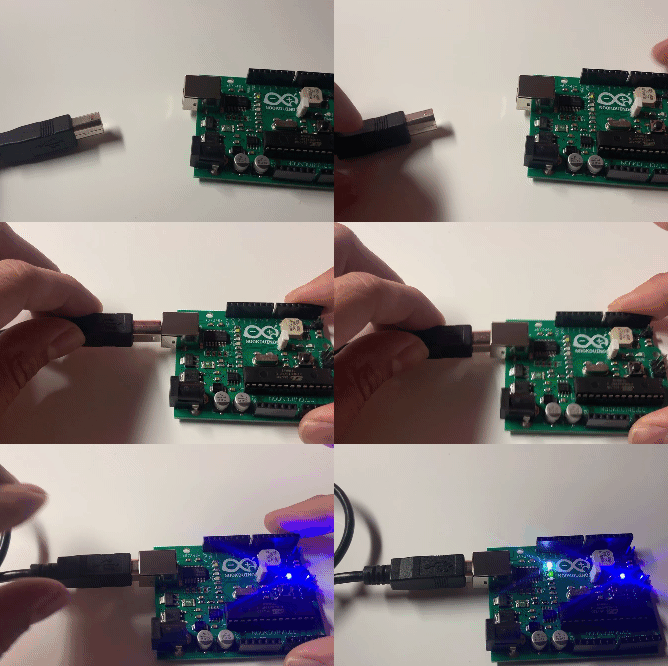
Your Nookduino has something to say, so listen up, ya heard? Plug one end of your USB-B cable into the Nookduino and the other into a computer or USB charger. The Nookduino will immediately power on and speak its message to you. Once you're ready to start programming, go to the next step.
2. Installing Drivers
Windows users will need to install drivers to communicate with the Nookduino. Windows Update can automatically install the drivers, see this PDF for step by step instructons.. If they are not automatically installed you can download the drivers here NOTE: You will need to register a free Cypress account to download the drivers. If you're unsure if the drivers are installed correctly or not, move onto the next step (Installing Arduino Software): you can always come back and reinstall the drivers later.
Mac and Linux do not need special drivers installed.
Tech note: The Nookduino uses the Cypress CY7C65213. Chip info can be found here and USB Host and development files can be found here.
3. Install the Arduino Software (Arduino IDE)
The Nookduino is compatible with any software that supports the Arduino Duemilanove / ATMega 328 but we'll be sticking with the downloadable version of the Arduino IDE.
Arduino Download Page
On the download page pick the latest version of the Arduino IDE for your system (1.8.13 as of this writing). Contributing to the Arduino fund is encouraged but not necessary - you can click 'just download' to download the IDE for free.
4. Installing Nookduino Hardware files and Libraries
This step will install support files like the board definitions and Animalese library.
If you are on MacOS go to
Arduino -> Preferences
If you are on Windows or Linuz go to
File -> Preferences
In the text box after "Additional Boards Manager URLs" put the following URL
http://nookduino.cc/files/package_nookduino1_index.json
Now go to
Tools -> Board -> Board Manager
Scroll to the bottom of the list or search for 'Nookduino' and click 'Install'
TODO: If you want to skip this step and only use built-in Arduino features, or if you want to learn how to manually install libraries for other boards, check out This link
5. Connecting to your board
With your Nookduino disconnected from your computer, open the Arduino IDE and go to
Tools -> Port
Depending on what devices and drivers you have set up on your computer, you might see some serial ports already. If you do, make a note of what ports are present.
Now you can plug in your Nookduino and take another look at Tools -> Ports. If everything has worked correctly, then you should see a new serial port. Serial ports will usually look something like:
- Windows:
COM*where * is a number, i.e. COM4, COM21. Usually not COM1 - Mac:/dev/cu.*,
- Linux: /dev/cu.
-
TODO: If you don't see a port for the Nookduino, check here
6. Opening a serial connection
Arduinos use a "Virtual Serial Port" to get reprogrammed and to communicate with other devices. The Arduino's IDE has a "Serial Monitor" that can send/receive simple text to/from the Nookduino. All brand new Nookduinos have a program on them that says something on the speaker and prints the message on the serial monitor. To read the message go to
Tools -> Serial Monitor
The default Nookduino sketch uses the the default serial monitor options ("Both NL & CR" drop down and "9600 baud" drop down)
If you type '1' and hit enter, you might get a surprise!
7. Programing your Nookduino
Here's what you've finally been waiting for!
From>
Tools -> Board -> Nookduino Boards
Pick "Nookduino"
Your serial port should be still set up from the last step, but it's always a good idea to make sure it's still selected
Tools -> Port
Let's load one of the most basic Arduino programs (or as Arduino calls them, 'Sketches'). Go to
File ->  Examples -> Examples for Nookduino ->Animalese ->
         _1_Blink
Now go to
Sketch -> Upload
Your board's TX and RX lights should start lighting up and after a few seconds you should get a 'Upload successful message". If you look at your board, you should see a single LED blinking on and off at about 1 seconds intervals.
8. Let's get talking
Let's make a message to ourselves!
The Animalese library is a modified version of the Talkie Library, which is based on TI's Speak and spell. The code can make voices say individual letters (and a lot more). But we'll just be using the letters.
File ->Examples -> Examples for Nookduino -> Animalese ->
          _2_Speak
Now go to
Sketch -> Upload
9. Speak and Spell
Let's make a message to ourselves!
We can also print to the serial monitor while we talk
File ->Examples -> Examples for Nookduino -> Animalese ->
          _3_Speak_and_print
Now go to
Sketch -> Upload
11. Melody
The speaker can also be used for non-speach tones
File ->Examples -> Examples for Nookduino -> Animalese ->
          _4_melody
Now go to
Sketch -> Upload
11. Going Further
- Change the text to make the Nookduino speak your own message.
- Try different voices by putting
//before#include "Vocab_Acorn.h"and remove the//fromVocab_US_Large.hor"Vocab_US_TI99.h" - Try chaning the numbers in
Animalese voice(long(40000),long(12000));to adjust speed and pitch
12.Talkie Library
You can also use the original Talkie Library to have your board say a huge number of different words. Check out the examples under
File -> Examples -> Examples for Nookduino -> Talkie
13. Quick Tips
- Pin 0,1, 3, and 13 may take special care to use. We suggest using other pins until you get the hang of everything.
- If you want to use pin 3 for an external function or with an external speaker, remove the white jumper from the white header, and put it on the black header.