PCB Art
In the planning stages of the Nookduino, I asked NPCmusic to design a logo and Blenderbat to make some art for the board. They were both amazing to work with.
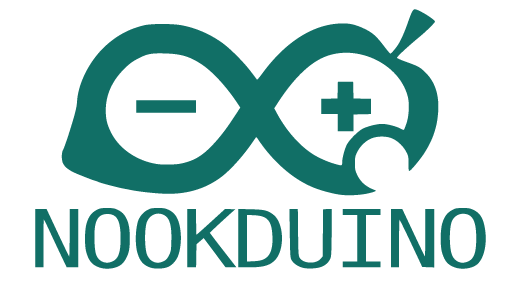
I sent NPCMusic the Arduino logo and the Animal Crossing logo, and in no time he had created the perfect mashup. The clean lines went into Inkscape's vector converter with no issues and the rest was up to me to get the art into a PCB.
Blenderbat's task was less well defined. I knew I wanted some kind of Animal Crossing related art on the board, but I wasn't sure exactly what. I sent her some various 'inspiration' and a general direction of what I was thinking about, and she came back with a variety of possible routes.
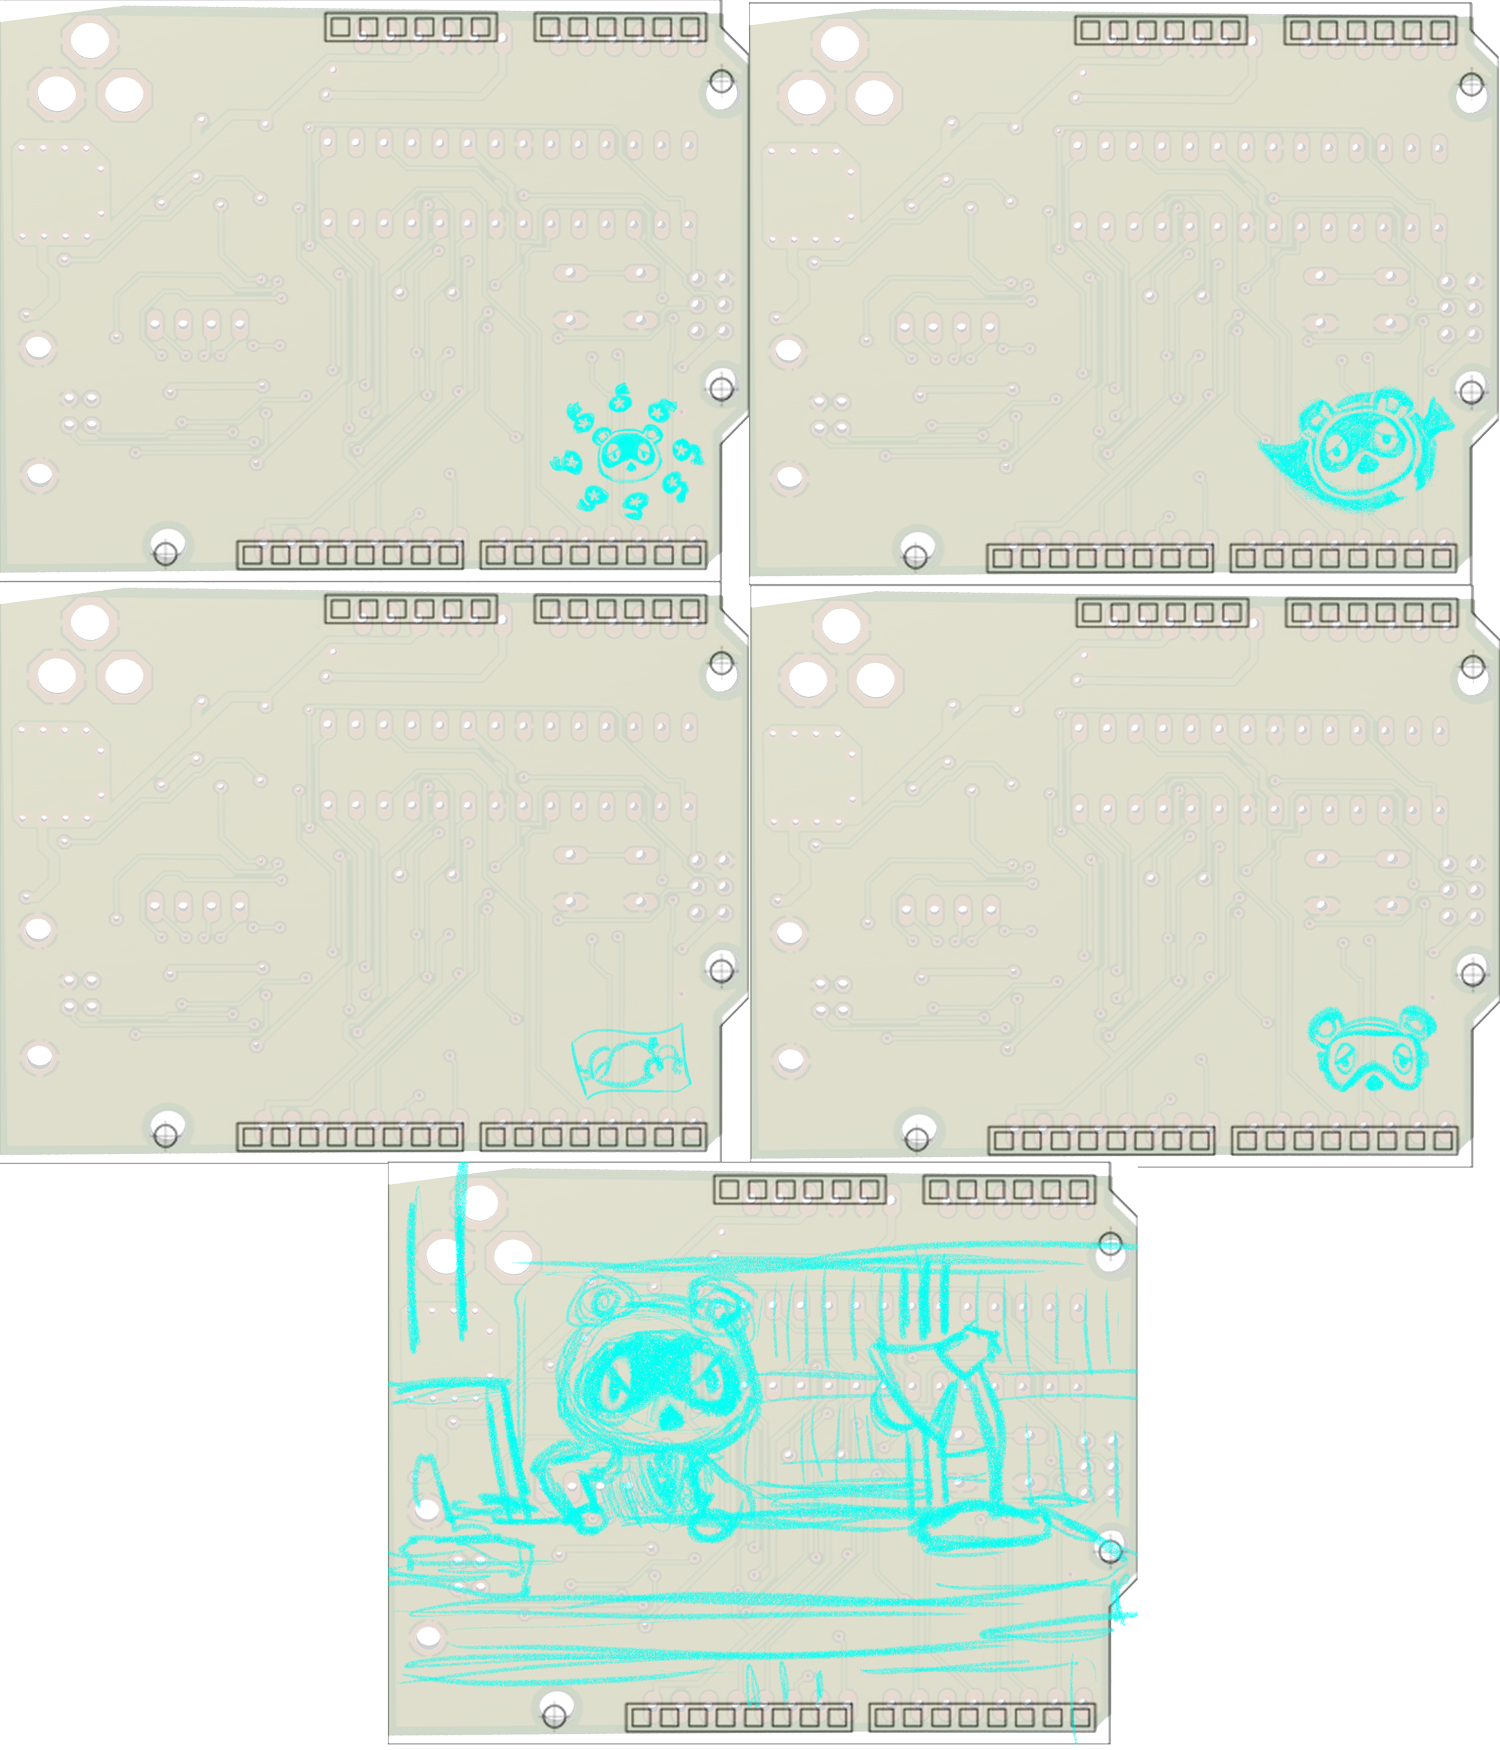
In the end I picked the Nook Face with Goggles because I felt like it had the right spirit for the board and the right amount of complexity. Blenderbat sent me the vector art and I was ready to go.

I used Eagle to put these boards together. While eagle is a great platform, its missing some niceties, like built in image import. Luckily Eagle has built in scripting support, so while some things are a pain, they are still possible.
Sparkfun has a great tutorial about bringing in images into your board. It took me several tried to get it right, as if you miss any step, or if there's any part of the image that didn't get every step, the import can break in strange ways (incorrect sizing, missing paths, or more)
The tutorial suggests setting the line width to any non zero number, so something like .0001" gets you very thin lines, and can deal with just about any image correctly. From what I understand, most manufacturers should be able to handle this correctly even though they're not printing every single line. However since I was going through DirtyPCBs I was a little paranoid that I'd end up with problems id I didn't sent the line width to the minimum specs Dirty PCBs has listed .15mm. Now this meant that I had to modify my initial drawings by reducing the strokes, so that when imported with the thicker lines, everything came together as expected.
The logos were pretty easy, as one was just silkscreen and one was just copper. The Nook Face + goggles was a little trickier, since I wanted the goggles and eyes to be copper while the rest was silkscreen. Moving items to different layers isn't too difficult, but making sure I imported different parts and kept the alignment was a little tricky. The biggest problem with mixing copper and silkscreen is registration. A you can see, I had an issue where a slight registration issue shows up on the board.
For future projects I'd like to do more with PCB art, possibly to the point that the copper can be functional and part of the art.
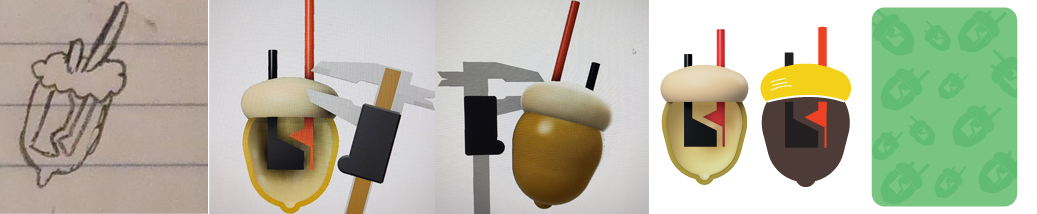
While not PCB art, Wade's art was incredibley important to the project, and I didn't even have to ask! I mentioned wanting to make DIY cards, and he was off to the races. He jumped into Fusion 360 and made the iconic LEDcorn featured on the DIY cards and this site.
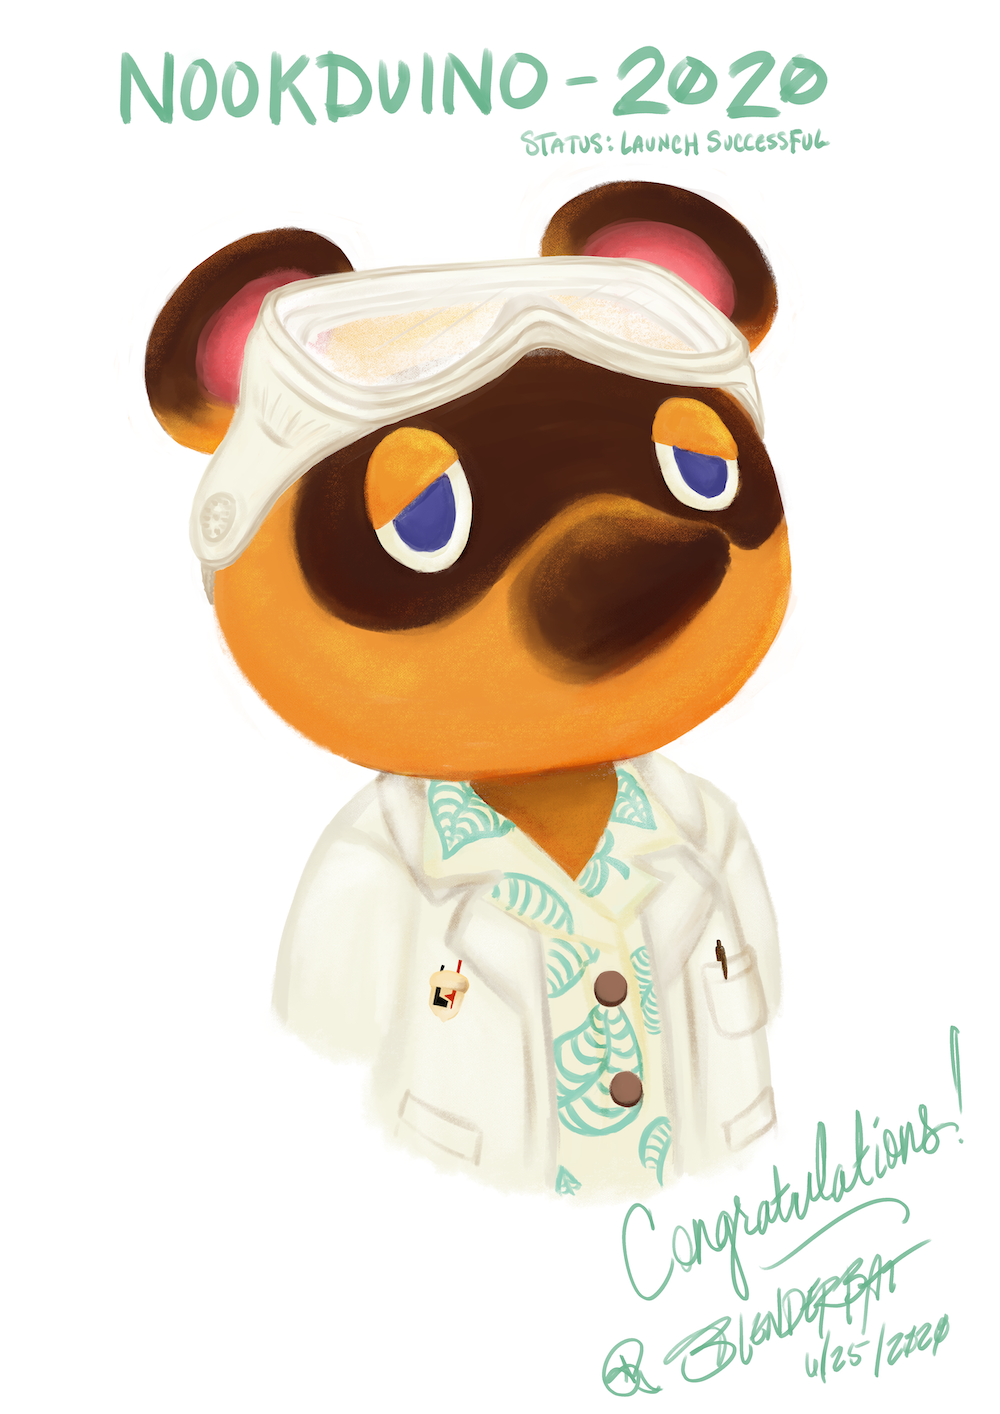
In another show of non PCB art, Blenderbat also surprised us with this wonderful piece of art. Launch Successful!